If you are into fresh herbs and spices, you may want to consider about how to grow turmeric – not only for the sake of your kitchen but also for some health reasons.
Turmeric won’t only affect the flavor of the food as well as the one responsible for the yellowish curry hue, but it is also known for its natural medicinal traits.
If you want to improve your own fitness factor as well as promoting healthier and more natural meal preparation, having your own turmeric garden at home will be a great convenience.
Table of Contents
The Many Benefits of Turmeric
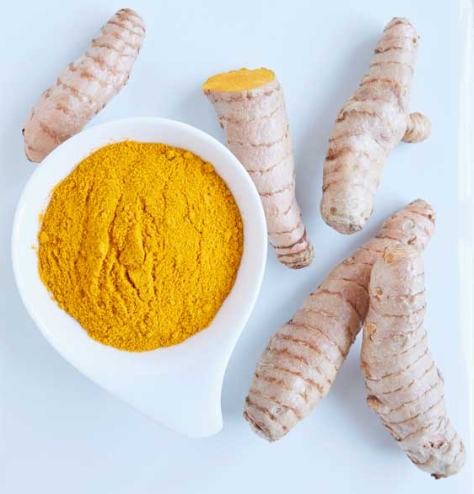
There are some powdery turmeric products available on the market. Sure, they are efficient to help you prepare the food, but nothing can beat the benefits of fresh turmeric.
Moreover, fresh turmeric is stronger and more potential than over-the-counter blood thinners, antidepressants, arthritis drugs, anti-inflammatory, cholesterol medication, chemotherapy drugs, steroids, and diabetes drugs.
Here are some other benefits that turmeric can give to you:
- It is a powerful natural substance that can deal with inflammation, such as rheumatoid arthritis. After all, inflammation is the major reasons for most ailments these days.
- It is a super powerful substance that can reverse insulin resistance. As a result, it can help you lower blood sugar.
- It can help you deal with Chron’s disease, inflammatory bowel disease, or other issues related to the serious gastrointestinal matter. In general, such diseases can be treated with some drugs, but these drugs often have negative (and annoying) side effects.
- It is great to help the body rebuild the (good) gut bacteria naturally
- It can improve cognitive function and increase memory
- It can be as a natural painkiller to treat burns
- It can be used to kill cancer cells as well as preventing the cells from growing again. It is believed to treat skin, stomach, bowel, and breast cancer
Know when to Plant
Turmeric takes around 7 months to 10 months from the moment of the planting to the harvesting time. It won’t grow well if the temperature is lower than 18 degrees Celsius or 65 degrees Fahrenheit.
If you live in cold areas or during winters, you need to grow the turmeric indoors. Even if you live in a warmer area, it would be best to start planting indoor.
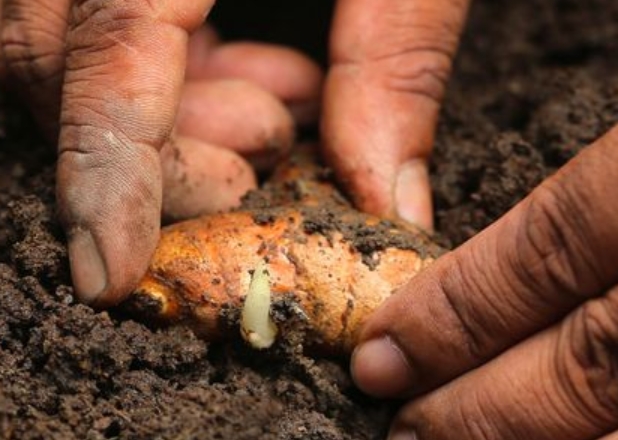
The best way to know how to grow turmeric and when the right time is, you need to count back around 10 months from the first frost. For instance, if the first frost takes place in the middle of October, it means that you need to start growing from between the middle of December and the middle of March.
This matter won’t be too much of a concern if you have a sunny and big indoor space (where you can grow the plant) or when the growing season is longer.
Growing the Turmeric
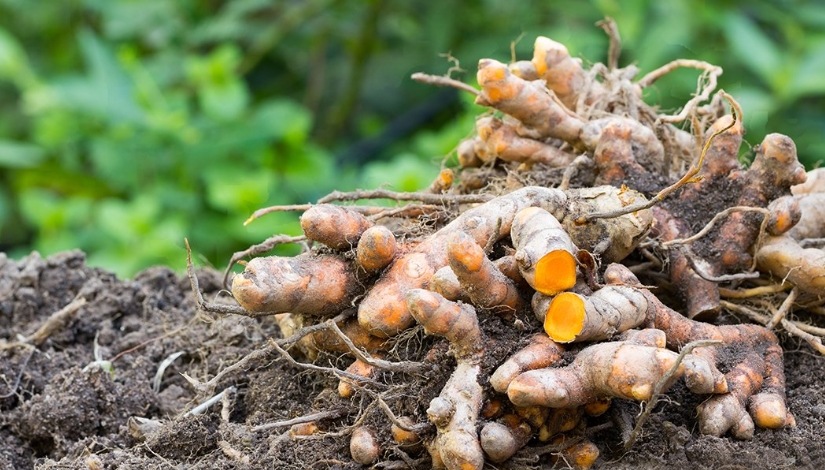
If you want to learn about how to grow turmeric, you need to understand that fresh root (or rhizomes) is the best option for the growing. You can buy the turmeric root online or at the grocery stores. If it is even possible, you should consider buying the organic one.
The roots should be plump, firm, clean, and healthy in the term that it should be free from any mold or mildew or such a thing. The roots should be at least 2 to 4 inches (around 5 to 10 centimeters).
In the event that you get a root with several (or many) branches, you can cut the piece to smaller pieces. Make sure to use a clean knife. Then plant separately each of the piece.
The container should be 30 centimeters or 12 inches in width and depth. If you are planning on transplanting the plant later outside, a smaller pot would be nice. Plant the roots 5 centimeters deep and use well-draining soil.
Make sure that the roots lie flat within the soil and you use a rich potting mix. If you are using the soil made for veggies, that’s fine. But if you can make your own compost, that’s even better.
Place the pot in a warm area whose temperature is between 86 degrees Fahrenheit to 95 degrees (or between 30 degrees Celsius and 35 degrees).
In the event that you can’t have any warm area, you can buy a heating pad and place the pot on top of it. It should be easy to find one at the local garden store or center.
How to grow turmeric properly:
- Cut the roots (or the rhizomes) into sections. Make sure that each section has 2 to 3 buds
- Fill the pots with good soil
- Lay the root sections right on the soil and make sure to cover it with soil (more is okay)
- Water well. Make sure that both the container and the soil have good drainage system so there won’t be any mold or fungus growing in the soil
- Always start from the warmest place. Placing the pot at lower temperature will only result in rotting –and it is highly likely that your plant will fail growing instead of having a successful outcome.
The Growing Plants
If you do everything right, you should be able to see the shoots within a month. Once it happens, you can place the pot in the sunny or hot window. What about putting them outside? That’s okay but make sure that the plant is already a few inches in height.
You need to make sure that you have enough room because mature plants can be a meter tall or around 3 feet tall. You don’t want to constrict their growth.
To ensure proper growth, keep everything warm and light. Only water when needed. You want the soil to be moist but not flooded or even soggy. Mist the leaves twice a day to keep up the humidity. Don’t let your plant dry or be excessively dry.
When the plants are growing, move them to bigger pots that have been filled with soil. At this point, you can reduce the temperature of the heating pad some degrees once in every week – stop when it has reached 70 degrees.
If you have reached this stage, remove the heat pad but make sure that your indoor temperature is around 68 degrees Fahrenheit. If your indoor temperature doesn’t come to this level, don’t remove the heating pad. If your efforts are successful, you should be able to see more shoots.
If the frost has passed or the temperature outdoor is warm enough, you can consider moving the plants outdoor. Remember, temperature plays a crucial role in how to grow turmeric properly so don’t take it for granted or underestimate it.
For the first few days, have a shade over the plants – a partial one is enough. It would protect the tender leaves from being sunburned. Don’t forget to water the plants continuously and check whether it remains moist or not. Don’t forget to feed the compost once in every two weeks. Using the recommended fertilizer us also a good idea.
Time to Harvest
Calculate how long you have planted the turmeric. Your plant is mature after 7 months to 10 months. You should check the stem and leaves. When they are turning dry and brown, it means that they are mature enough.

You can tip out your plants (including the soil and everything) and simply shake the fresh turmeric off the soil. Cut the stems around an inch or it can be above the rhizome mass. And then wash it well.
Proper Storage
Your rhizomes should stay fresh if you keep them in the fridge. You can put them in a container or an airtight bag. Keep them in the fridge and they will remain fresh for 6 months. Don’t forget to set aside some of them so you can replant them again.
What about making your own powder, just like the one sold at the market? Feel free to do it. Pick the fresh ones and toss them in a pot. Cover them in water (make sure that they are immersed under the water) and then boil it. Simmer them until you can pierce them easily with the fork. The process can take 45 minutes to 60 minutes –or even longer – depending on the size.
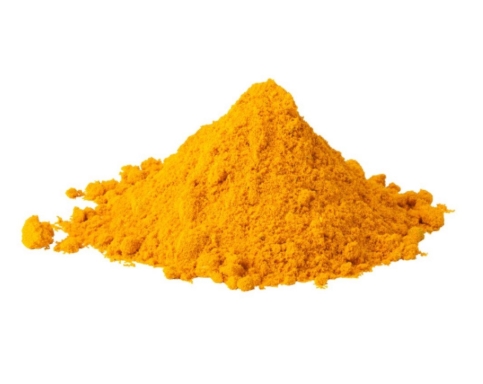
After the rhizomes are drained, you can rub off the skin with your fingers. But if you don’t want to do this, that’s okay. Dry the rhizomes with a food dehydrator or just leave them under the sun. They should be brittle or snap easily. Once you have reached this stage, you can dry them easily.
Use the mortar and pestle or the regular coffee grinder to make the powder. You will get the quality powder that you want. But make sure to wear gloves when processing the turmeric rhizomes so your hands won’t have to be bright orange. The hue is very difficult to wash off.
There you have it – the preparation for the planting and how to store the results easily. Now that you already know how to grow turmeric properly, you can start making your own garden.
